Are you tired of carrying around a bulky wallet or fumbling through your purse for your credit cards?
Setting up Apple Pay can help simplify your life by allowing you to make purchases with just a tap of your phone but how to set up Apple Pay?
With Apple Pay, you can securely store your credit and debit cards on your iPhone, iPad, or Apple Watch and use them to make purchases in stores, online, and in apps.
To get started with Apple Pay, you’ll need to add your cards to the Wallet app on your device.
This process is quick and easy, and you can add multiple cards to your account.
Once your cards are added, you can use Apple Pay to make purchases at millions of locations worldwide.
Plus, when you use Apple Pay, your card information is never shared with merchants, so your transactions are more secure than ever before.
With the convenience and security of Apple Pay, you’ll wonder how you ever lived without it.
In this article, we’ll walk you through the steps to set up Apple Pay on your device, so you can start making purchases with ease.
Whether you’re buying groceries, grabbing a coffee, or shopping online, Apple Pay makes it easy to pay for the things you need without the hassle of cash or cards.
Table of Contents
ToggleHow To Set Up Apple Pay: An Overview Of What Apple Pay Is
If you’re new to Apple Pay, you might be wondering what it is and how it works.
Simply put, Apple Pay is a digital wallet that allows you to make secure, contactless payments with your iPhone, iPad, or Apple Watch.
You can use it to pay for goods and services at participating merchants, as well as to send and receive money from friends and family.
To use Apple Pay, you’ll need to add your credit or debit card to the Wallet app on your device.
The process is quick and easy, and you can add multiple cards if you like.
Once your card is added, you can start using Apple Pay to make purchases.
Apple Pay uses a technology called Near Field Communication (NFC) to transmit payment information between your device and the payment terminal.
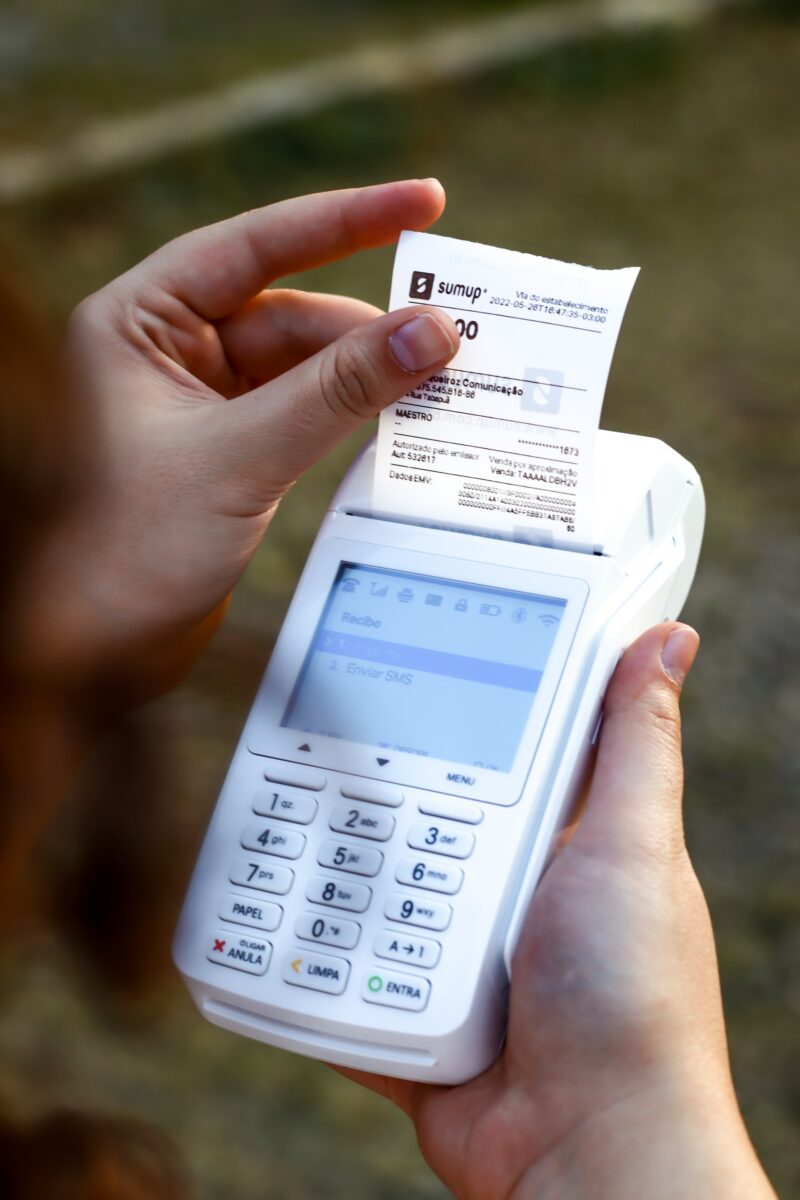
To make a payment, simply hold your device near the terminal and authenticate the transaction with Touch ID or Face ID.
You don’t need to open the Wallet app or even wake up your device – just hold it near the terminal and you’re good to go.
One of the great things about Apple Pay is that it’s incredibly secure.
When you make a payment, your card details are never transmitted to the merchant or stored on your device.
Instead, Apple Pay uses a unique Device Account Number (DAN) to process transactions.
This means that even if your device is lost or stolen, your card information remains safe and secure.
Overall, Apple Pay is a convenient, secure, and easy-to-use way to make payments with your iPhone, iPad, or Apple Watch.
Whether you’re shopping online or in-store, it’s a great option for anyone who wants to streamline their payment process and keep their information safe and secure.
Set Up Apple Pay On Your iPhone
If you’re looking for a quick and easy way to make payments with your iPhone, Apple Pay is the way to go.
With Apple Pay, you can make secure purchases in stores, online, and in apps without ever having to pull out your wallet.
Here’s how to get started.
Add A Credit Or Debit Card
To set up Apple Pay on your iPhone, you’ll first need to add a credit or debit card to your Wallet app.
Here’s how:
- Open the Wallet app on your iPhone.
- Tap the plus sign in the upper-right corner of the screen.
- Follow the on-screen instructions to enter your card details, including the card number, expiration date, and security code.
- Verify your card with your bank or card issuer.
Once your card is verified, you can start using Apple Pay to make purchases in stores, online, and in apps that accept contactless payments.
Set Up Apple Cash
In addition to adding a credit or debit card to your Wallet app, you can also set up Apple Cash.
Apple Cash is a feature that lets you send and receive money with friends and family using the Messages app.
Here’s how to set it up:
- Open the Wallet app on your iPhone.
- Tap on the Apple Cash card.
- Follow the on-screen instructions to set up Apple Cash, including verifying your identity and linking a debit card.
Once you’ve set up Apple Cash, you can use it to send and receive money with friends and family directly from the Messages app.
Overall, setting up Apple Pay on your iPhone is a quick and easy process.
Just follow the on-screen instructions to add your credit or debit card and set up Apple Cash, and you’ll be ready to start making secure and convenient payments with your iPhone.
Set Up Apple Pay On Your iPad
If you want to make secure payments in apps and on websites that support Apple Pay, you can easily set it up on your iPad.
Here’s how you can add a credit or debit card to your Wallet app on your iPad:
Add A Credit Or Debit Card
- Open the Wallet app on your iPad.
- Tap the plus (+) button in the top-right corner of the screen.
- Follow the instructions on the screen to enter your card details manually or use your iPad’s camera to scan your card.
- If necessary, verify your information with your bank or card issuer. They might ask you to provide more information or to download an app before approving your card for use with Apple Pay.
- Once your card is verified, tap “Next” and accept the terms and conditions.
You can add multiple cards to your Wallet app and choose which one to use for each transaction.
To make a payment using Apple Pay, simply tap the “Pay with Apple Pay” button at checkout and use Touch ID or Face ID to confirm the payment.
It’s important to note that not all cards are compatible with Apple Pay, so check with your bank or card issuer to see if your card is eligible.
Additionally, some cards may have fees associated with using Apple Pay, so make sure to read the terms and conditions carefully.
Overall, setting up Apple Pay on your iPad is a quick and easy process that can make online and in-store purchases more convenient and secure.
Set Up Apple Pay On Your Mac
If you have a Mac with Touch ID, setting up Apple Pay is a breeze.
You can use it to make payments on websites that support Apple Pay.
To set up Apple Pay on your Mac, you need to add at least one credit card, debit card, prepaid card, store card, or Apple Card to Wallet. Here’s how to do it:
Add A Credit Or Debit Card
- Open the Wallet app on your Mac.
- Click the “+” button to add a new card.
- Position your card in the camera frame so that your computer enters all of the details automatically, or click “Enter Card Details Manually”.
- Verify your card details, check whether the expiration date is correct, and type in your security code.
- Click “Next” to confirm.
If you have an older Mac without Touch ID, you can still set up Apple Pay on your Mac by completing your purchase using Apple Pay on your compatible iPhone or Apple Watch.
Here’s how to do it:
- On your iPhone, go to Settings > Wallet & Apple Pay and turn on “Allow Payments on Mac”.
- On your Mac, go to System Preferences > Wallet & Apple Pay and make sure your iPhone or Apple Watch is selected as your default payment method.
Once you’ve set up Apple Pay on your Mac, you can use it to pay for online purchases, in-store purchases, and even transit fares in some cities.
Just look for the Apple Pay logo at checkout and tap your Touch ID or double-click the side button on your Apple Watch to authorize the payment.
Note that some banks and card issuers may charge fees for using Apple Pay, so be sure to check with your bank or card issuer for more information.
Also, make sure to read the terms and conditions carefully to understand how Apple Pay protects your privacy and security.
That’s it! You’re now ready to start using Apple Pay on your Mac for fast, secure, and convenient payments.
Set Up Apple Pay On Your Apple Watch
If you have an Apple Watch, you can set up Apple Pay to make payments with just a tap on your wrist.
Here’s how to add a credit or debit card to your Apple Watch:

Add A Credit Or Debit Card
- Open the Wallet app on your Apple Watch.
- Tap the “+” icon to add a card.
- Choose “Add a Credit or Debit Card.”
- Follow the instructions to enter your card details, including the card number, expiration date, and security code.
- You may be prompted to verify your identity with your bank or card issuer.
- If you have a Chase card, you can add it to your Apple Watch directly from the Chase app.
- Once your card is added, you can set it as your default payment method or choose to use another card for each transaction.
When you make a payment with Apple Pay on your Apple Watch, you’ll need to hold your wrist near the contactless payment reader and double-click the side button.
You’ll feel a subtle vibration and hear a sound to confirm that the payment was successful.
Each transaction is also assigned a unique transaction code for added security.
It’s important to note that not all banks and card issuers support Apple Pay, so make sure to check with your bank before adding a card.
Additionally, some cards may have fees associated with using Apple Pay or may not be compatible with all devices or payment methods.
Overall, setting up Apple Pay on your Apple Watch is a convenient way to make contactless purchases in stores, online, and in apps without needing to carry physical cards or cash.
Plus, with added security features like Touch ID and unique transaction codes, you can feel confident that your transactions are safe and secure.
Key Takeaways
Setting up Apple Pay is a simple process that requires a few steps.
First, you need to make sure that you have a compatible device with the latest version of iOS or iPadOS, watchOS, or macOS.
You also need a supported card from a participating card issuer and an Apple ID signed in to your Apple device.
To check if your card is compatible with Apple Pay, contact your card issuer.
Once you have confirmed that your card is compatible, you can add it to Apple Pay by following these steps:
- Open the Wallet app on your iPhone.
- Tap the “+” button in the top right corner.
- Choose the type of card you want to add to Apple Pay, which is either “Credit or Debit Card” or “Other Cards.”
- Follow the on-screen instructions to add your card.
Once you have added your card, you can start using Apple Pay to make payments at participating merchants.
To make a payment with Apple Pay, simply hold your iPhone or Apple Watch near the contactless reader and authenticate the transaction with Face ID, Touch ID, or your passcode.
It’s important to note that Apple Pay is a secure payment method that uses advanced security features to protect your personal information.
Your card number is never stored on your device or shared with merchants, and each transaction is encrypted for added security.
Overall, setting up Apple Pay is a quick and easy process that can make your transactions more convenient and secure.
With just a few simple steps, you can start using Apple Pay to make payments at millions of merchants worldwide.

