Connecting your iPhone to your iPad can be a useful way to share files, apps, and other data between devices.
Whether you want to transfer photos from your iPhone to your iPad or access your iPhone’s internet connection on your iPad, knowing how to connect iPhone to iPad would pretty much make you tech savvy.
One way to connect your iPhone to your iPad is by using iCloud.
By enabling iCloud on both devices, you can sync apps, photos, contacts, and other data between them automatically.
Another option is to use Quick Start, a feature that lets you transfer data from your old iPhone to your new one by placing the two devices near each other.
If you want to use your iPhone’s internet connection on your iPad, you can set up a personal hotspot on your iPhone and connect your iPad to it via Wi-Fi.
This can be useful if you’re in an area with no Wi-Fi access but have a strong cellular signal on your iPhone.
Whatever your reason for connecting your iPhone to your iPad, there are several methods to choose from.
Table of Contents
ToggleConnecting iPhone To iPad Via Wi-Fi
Connecting your iPhone to your iPad via Wi-Fi can be a great way to share content and access the internet on both devices.
Here are the steps to connect your iPhone to your iPad via Wi-Fi.
Step 1: Make Sure Both Devices Are On The Same Wi-Fi Network
Before you can connect your iPhone to your iPad via Wi-Fi, both devices must be connected to the same Wi-Fi network.
To do this, go to the Settings app on both devices and make sure that Wi-Fi is turned on.
Then, select the same Wi-Fi network on both devices.
Step 2: Enable Personal Hotspot On iPhone
To enable the Personal Hotspot feature on your iPhone, go to the Settings app and select Personal Hotspot.
Then, turn on the Personal Hotspot feature.
You may be prompted to enter a password for the hotspot.
Step 3: Connect iPad To iPhone’s Personal Hotspot
Once you have enabled the Personal Hotspot feature on your iPhone, you can connect your iPad to it.
To do this, go to the Settings app on your iPad and select Wi-Fi.
Then, select the name of your iPhone’s Personal Hotspot and enter the password if prompted.
That’s it! Your iPhone and iPad are now connected via Wi-Fi, and you can share content and access the internet on both devices.
Keep in mind that using Personal Hotspot may use data from your cellular plan, so be sure to monitor your usage if you have a limited data plan.
Connecting iPhone To iPad Via Bluetooth
Connecting your iPhone to your iPad via Bluetooth is a quick and easy way to share content between the two devices.
Follow these simple steps to get started.
Step 1: Turn On Bluetooth On Both Devices
First, make sure that Bluetooth is turned on for both your iPhone and your iPad.
You can do this by going to Settings > Bluetooth on each device.
Step 2: Pair iPhone To iPad
Once Bluetooth is turned on for both devices, you can pair your iPhone to your iPad by following these steps:
- On your iPad, go to Settings > Bluetooth and make sure that Bluetooth is turned on.
- On your iPhone, go to Settings > Bluetooth and make sure that Bluetooth is turned on.
- Your iPhone will automatically start searching for nearby Bluetooth devices. When your iPad appears in the list of available devices, tap on it to pair the two devices.
- Follow the on-screen instructions to complete the pairing process.
Once your iPhone and iPad are paired via Bluetooth, you can easily share content between the two devices.
For example, you can use AirDrop to quickly send photos, documents, and other files from your iPhone to your iPad.
Keep in mind that some features, such as Handoff and Continuity, require both Bluetooth and Wi-Fi to be turned on for both devices.
If you’re having trouble with these features, make sure that both Bluetooth and Wi-Fi are turned on for both your iPhone and your iPad.
That’s it! With Bluetooth turned on and your iPhone and iPad paired, you can easily share content between the two devices.
Connecting iPhone To iPad Via USB Cable
Connecting your iPhone to your iPad using a USB cable is a great way to transfer files and share data between the two devices.
In this guide, we’ll walk you through the steps to connect your iPhone to your iPad via USB cable.
Step 1: Connect iPhone To Computer
The first step is to connect your iPhone to your computer using a USB cable.
Make sure your computer is turned on and iTunes is installed.
Step 2: Trust Computer On iPhone
When you connect your iPhone to your computer, a pop-up message will appear on your iPhone asking if you want to trust this computer.
Tap “Trust” to allow your iPhone to connect to your computer.
Step 3: Connect iPad To Computer
Next, connect your iPad to your computer using a different USB cable.
Make sure your iPad is turned on.
Step 4: Trust Computer On iPad
When you connect your iPad to your computer, a pop-up message will appear on your iPad asking if you want to trust this computer.
Tap “Trust” to allow your iPad to connect to your computer.
Step 5: Open iTunes On Computer
Open iTunes on your computer and wait for it to recognize your iPhone and iPad.
Step 6: Transfer Files From iPhone To Computer
To transfer files from your iPhone to your computer, select your iPhone in iTunes and click on “File” > “Devices” > “Transfer Purchases from [your iPhone name]”.
This will transfer all purchased content from your iPhone to your computer.
Step 7: Transfer Files From Computer To iPad
To transfer files from your computer to your iPad, select your iPad in iTunes and click on “File” > “Add to Library” to add files to your iTunes library.
Then, select the files you want to transfer to your iPad and click on “File” > “Devices” > “Sync [your iPad name]”.
This will sync the selected files to your iPad.
That’s it! You have successfully connected your iPhone to your iPad via USB cable and transferred files between the two devices using iTunes.
Syncing iPhone And iPad Via iCloud
If you want to sync your iPhone and iPad, iCloud is a great option.
Here’s how to do it:
Step 1: Sign In To iCloud On Both Devices
First, you need to sign in to iCloud on both your iPhone and iPad.
To do this, go to Settings > [Your Name] > iCloud on both devices and sign in with your Apple ID.
Step 2: Turn On iCloud Syncing For Data Types
Once you’re signed in to iCloud on both devices, you need to turn on iCloud syncing for the data types you want to sync.
Here’s how to do it:
- On your iPhone, go to Settings > [Your Name] > iCloud and turn on the toggle switches next to every category of app and content that you want to sync between the iPhone and iPad.
- Repeat this process with your iPad. The settings must be set identically on both devices for the sync to work.
Step 3: Wait For Sync To Complete
After you’ve turned on iCloud syncing for the data types you want to sync, you just need to wait for the sync to complete.
This may take some time, depending on how much data you’re syncing.
Once the sync is complete, your iPhone and iPad should be synced up and ready to go!
Keep in mind that iCloud syncing may not be the best option for everyone.
If you have a lot of data to sync, it may take a long time and use up a lot of your iCloud storage.
Additionally, if you don’t have a strong internet connection, syncing may be slow or unreliable.
Overall, though, iCloud syncing is a great option for many people who want to keep their iPhone and iPad in sync.
Using Airdrop To Transfer Files
Transferring files between your iPhone and iPad can be a hassle, especially if you don’t have a cable handy.
Fortunately, Apple provides a convenient solution in the form of Airdrop.
With Airdrop, you can easily share files wirelessly between two Apple devices.
Here’s how to use Airdrop to transfer files between your iPhone and iPad:
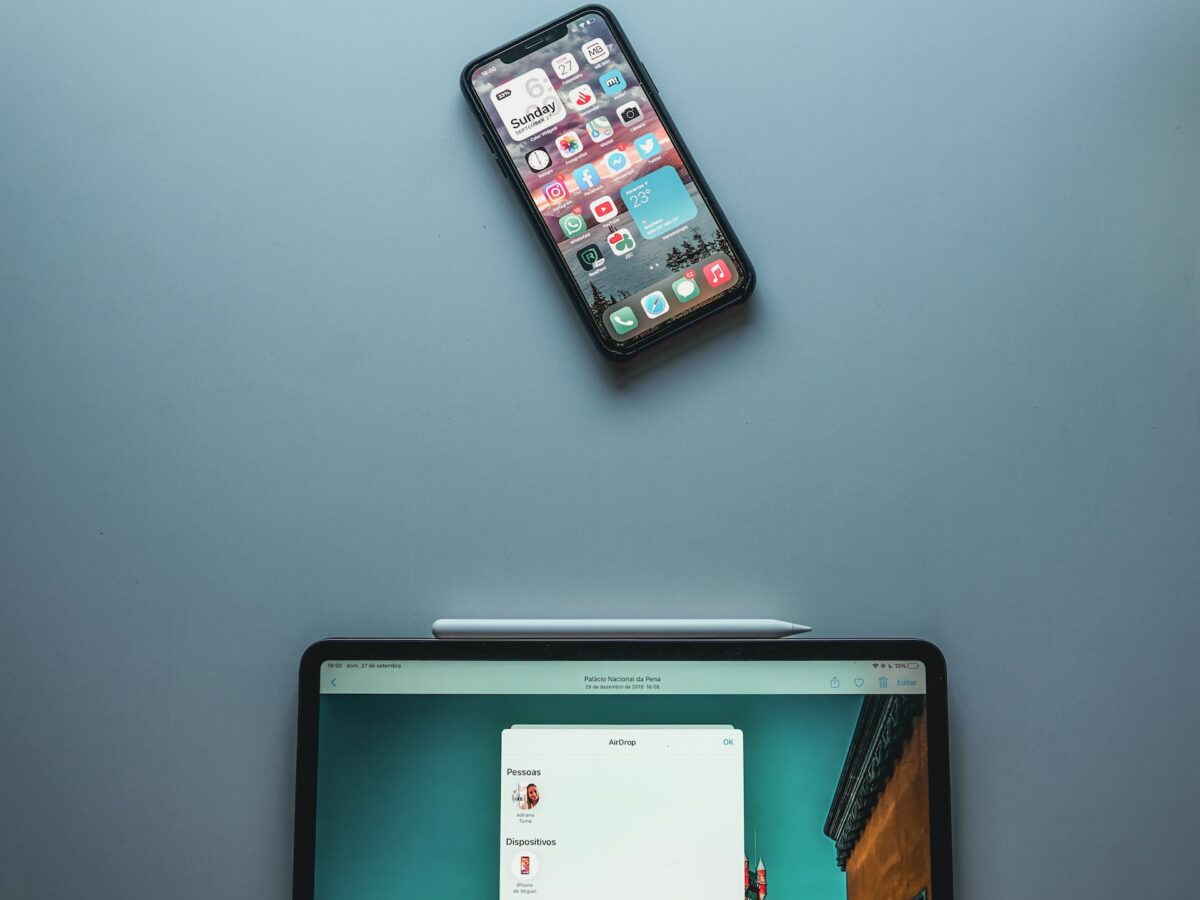
Step 1: Turn On Wi-Fi And Bluetooth On Both Devices
Before you can use Airdrop, you need to make sure that Wi-Fi and Bluetooth are turned on for both your iPhone and iPad.
To do this, go to the Settings app on each device, then tap on Wi-Fi and Bluetooth to enable them.
Step 2: Enable Airdrop On Both Devices
Next, you need to enable Airdrop on both devices.
To do this, swipe up from the bottom of the screen on your iPhone or iPad to open the Control Center.
Then, tap on the Airdrop icon and select “Contacts Only” or “Everyone” depending on your preference.
Step 3: Select Content To Share
Now that Airdrop is enabled, you can select the content you want to share.
This can be anything from photos and videos to documents and files.
To select content, open the app that contains the content you want to share, then tap on the share icon.
Step 4: Share Content Via Airdrop
Finally, you can share your content via Airdrop.
To do this, tap on the Airdrop icon and select the device you want to share with.
Once the recipient accepts the transfer, the content will be sent wirelessly between your devices.
Using Airdrop is a simple and convenient way to transfer files between your iPhone and iPad.
With just a few taps, you can easily share photos, videos, and other content without the need for cables or complicated setup.
So next time you need to transfer files, give Airdrop a try!
Using Handoff To Transfer Media
If you want to transfer media from your iPhone to your iPad, you can use Handoff to seamlessly continue your task on the other device.
Here’s how to do it:
Step 1: Turn On Handoff On Both Devices
First, make sure that Handoff is enabled on both your iPhone and iPad.
To do this, go to Settings > General > AirPlay & Handoff and toggle on Handoff.
Step 2: Open App On iPhone
Next, open the app that you want to transfer media from on your iPhone.
For example, if you want to transfer a photo, open the Photos app.
Step 3: Continue On iPad
Now, pick up your iPad and swipe up from the bottom of the screen to open the App Switcher.
You should see the app that you opened on your iPhone at the bottom of the screen.
Tap on it to continue where you left off.
With Handoff, you can easily transfer media between your iPhone and iPad without any interruptions.
Just make sure that both devices are connected to the same Wi-Fi network and that Handoff is enabled in the settings.
Managing Storage On iPhone And iPad
If you own an iPhone and an iPad, managing storage space on both devices is essential to keep them running smoothly.

Here’s how you can manage storage on your iPhone and iPad.
Step 1: Check Storage Space On Both Devices
Before you start managing storage on your iPhone and iPad, it’s essential to check the available storage space on both devices.
To do this, go to Settings > General > iPhone/iPad Storage.
You’ll see a breakdown of how much space each app is taking up, and how much space is available.
Step 2: Manage Storage On iPhone
To manage storage on your iPhone, go to Settings > General > iPhone Storage.
Here, you’ll see a list of all installed apps and how much space they’re taking up.
You can tap on any app to see more details and options to manage storage. Some options include:
- Offloading unused apps: This will delete the app from your iPhone, but keep its data and documents. You can reinstall the app later without losing any data.
- Deleting apps: This will delete the app and all its data and documents from your iPhone.
- Reviewing large attachments: This will show you a list of attachments that are taking up a lot of space, such as photos and videos. You can delete them to free up space.
You can also manage storage for music, videos, and photos by going to Settings > Music, Settings > TV, and Settings > Photos, respectively.
Step 3: Manage Storage On iPad
To manage storage on your iPad, go to Settings > General > iPad Storage.
Here, you’ll see a list of all installed apps and how much space they’re taking up.
You can tap on any app to see more details and options to manage storage. Some options include:
- Offloading unused apps: This will delete the app from your iPad, but keep its data and documents. You can reinstall the app later without losing any data.
- Deleting apps: This will delete the app and all its data and documents from your iPad.
- Reviewing large attachments: This will show you a list of attachments that are taking up a lot of space, such as photos and videos. You can delete them to free up space.
You can also manage storage for music, videos, and photos by going to Settings > Music, Settings > TV, and Settings > Photos, respectively.
By managing storage on your iPhone and iPad, you can ensure that both devices are running smoothly and have enough space for new apps and content.
Don’t forget to regularly check your storage space and manage it accordingly.
How To Connect iPhone To iPad: The Principle Behind
If you’re wondering how to connect your iPhone to your iPad, the process is quite simple.
Essentially, both devices need to be connected to the same Wi-Fi network, and you need to activate a feature called AirDrop.
AirDrop is a built-in feature of iOS that allows you to wirelessly share files between devices.
To connect your iPhone to your iPad, follow these steps:
- Make sure both devices are connected to the same Wi-Fi network. If you’re not sure how to connect to Wi-Fi, go to Settings > Wi-Fi and select the network you want to connect to.
- Turn on AirDrop on both devices. To do this, swipe up from the bottom of the screen on your iPhone or iPad to open Control Center. Then, tap on the AirDrop icon and select “Everyone” to allow your device to be discoverable by other devices.
- Once AirDrop is enabled on both devices, you should see your iPad appear as an option on your iPhone. To send a file, simply select the file you want to share and tap the “Share” button. Then, select the iPad from the list of available devices.
- On your iPad, you should receive a notification asking if you want to accept the file. Tap “Accept” to receive the file.
That’s it! With these steps, you should be able to easily connect your iPhone to your iPad and share files wirelessly.
Key Takeaways
Connecting your iPhone to your iPad can be a useful way to access your files, apps, and data across devices.
Here are some key takeaways to keep in mind when connecting your iPhone to your iPad:
- Use Wi-Fi for the most reliable connection: Connecting your iPhone and iPad via Wi-Fi is the most reliable way to ensure a stable connection. Make sure both devices are connected to the same Wi-Fi network before attempting to pair them.
- Pair your devices using Bluetooth: Once your devices are on the same Wi-Fi network, you can use Bluetooth to pair them. Go to the Bluetooth settings on both devices and look for the other device in the list of available devices. Tap on the device to pair it.
- Sync your data across devices: Once your devices are paired, you can choose which data you want to sync between them. Go to the iCloud settings on your iPhone and make sure the apps you want to sync are set up to use iCloud. Then, go to the settings on your iPad and make sure the same apps are set up to use iCloud.
- Use mobile data for on-the-go connectivity: If you don’t have access to Wi-Fi, you can use your iPhone’s mobile data to connect your devices. Keep in mind that this can use up your data plan quickly, so use it sparingly.
- Take advantage of the benefits of syncing: Syncing your devices can save you time and effort by allowing you to access your data across devices. For example, you can start reading a PDF on your iPhone and pick up where you left off on your iPad.
Overall, connecting your iPhone to your iPad is a simple process that can have many benefits.
By following these key takeaways, you can ensure a reliable connection and take advantage of all the features that syncing your devices has to offer.

