Greetings, valued readers! Dive into today’s guide presented by our passionate tech team.
We’re exploring a fundamental task – moving songs from your beloved iPhone to your reliable computer.
Maybe you’re considering changing your device and wish to preserve your carefully curated music collection.
Alternatively, you might desire to enjoy your top tracks without your phone nearby. It’s also plausible that you’re aiming to store a backup of your tunes on a more secure platform.
In any case, knowing how to transfer music from an iPhone to a computer (whether it’s a PC or a Mac) is pretty simple.
So, let’s jump right in and explore how to move songs from iPhone to PC or Mac hassle-free.
But before we delve into these methods, let’s take a quick look at this comparative table we’ve created to help you decide which approach suits your needs the best.
| Method | Ease of Use | Effectiveness | Uses |
| EaseUS MobiMover | Super Easy | High Effective | Best all-in-one tool for all types of transfers, including music |
| iCloud | Moderate | Effective | Great for iPhone to Mac transfers; Can also transfer from iPhone to PC |
| Dropbox | Moderate | Moderate | Good for iPhone to PC transfer via free cloud storage |
| iTunes | Easy | Effective | Good for easy, wired transfer between iPhone and PC |
| Finder | Super Easy | Effective | Best for easy transfer between iPhone and Mac |
How To Transfer Music From iPhone To Computer Without iTunes
First of all, let’s see how you can transfer music from iPhone to computer without using one of the most used methods of data transfer between these two mediums; yes, we’re talking about the vaunted iTunes app.
While iTunes offers a straightforward method to move music to your computer, it might not be the ideal choice for everyone.
So, let’s explore three top techniques to transfer music from your iPhone to your computer.
Method 1. All-in-one Transfer Solution – EaseUS MobiMover
To transfer music faster and more efficiently, the first recommended method is to use a professional iPhone data transfer tool.
EaseUS MobiMover stands out as a versatile tool designed for diverse data transfers, including shifting songs from iPhone to computer.
Plus, it boasts a range of additional handy features for different tasks. If you’re in search of a direct approach, EaseUS MobiMover has got you covered.

Here are some reasons why you should choose EaseUS MobiMover for transferring files.
- Manage files and transfer data from iPhone to iPhone/iPad/iPod/PC/Mac or vice versa
- Easy and convenient to transfer music from iPhone to computer within a few clicks
- Back up data of your devices simply and quickly
- The best iTunes alternative to manage iPhone contents
- Boast an easy-to-use interface and various features, like downloading videos and music from other websites
To transfer your tracks from iPhone to computer, simply follow the steps below:
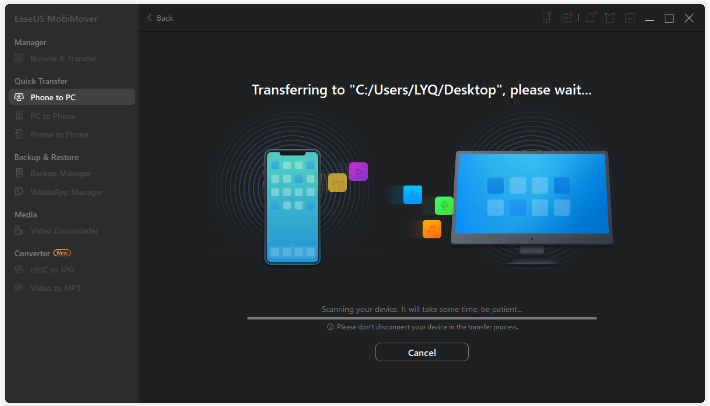
Step 1. Download and open MobiMover.
Head to the EaseUS MobiMover website, download the software and install it on your computer. Use a USB cable to link your iPhone to your computer. And then open EaseUS MobiMover and ensure the software recognizes your device.
Step 2. Select Music to Transfer.
Opt for the “Phone to Computer” function and pick “Music” from the file types. Decide whether to transfer all music, specific tracks, or entire playlists.

Step 3. Choose Destination.
Determine the folder on your computer where you’d like the music files saved.

Step 4. Start Transfer.
Click “Transfer” and patiently wait. Once finished, your music will be available on your computer!
Method 2. iCloud
For those who lean towards a hands-off method of transferring songs to their computer, iCloud might be the perfect fit. Here’s a guide on how to utilize it for moving music from iPhone to computer:
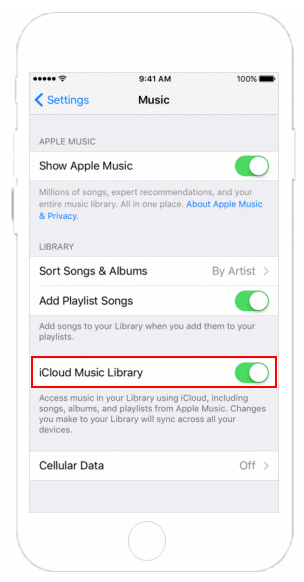
Step 1. Enable iCloud Music Library: On your iPhone, go to Settings, click on Music and turn on “iCloud Music Library.”
Step 2. Wait for Sync: Allow some time for your music library to sync with iCloud.
Step 3. Access iCloud on Computer: Open a web browser on your computer and visit iCloud.com. Log in with your Apple ID.
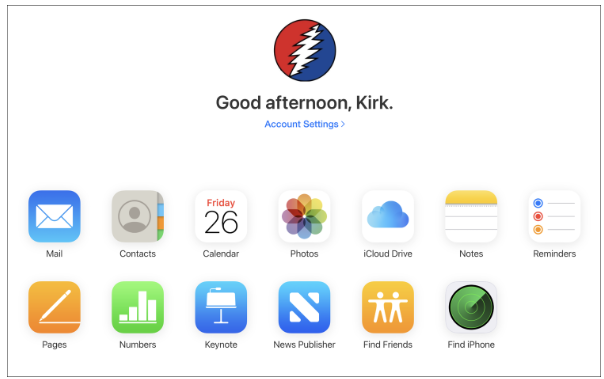
Step 4. Access Music: Click on the “Music” icon and there you have it – your music collection is accessible on your computer!
Method 3. Dropbox
You can also use an alternate cloud storage medium as a way of transferring music from iPhone to computer if you don’t want to use iCloud.
Dropbox is a good cloud storage platform to use in this case. Here’s how you can use this method:
Step 1. Download and Install Dropbox: If you haven’t already, download and install the Dropbox app on both your iPhone and computer.
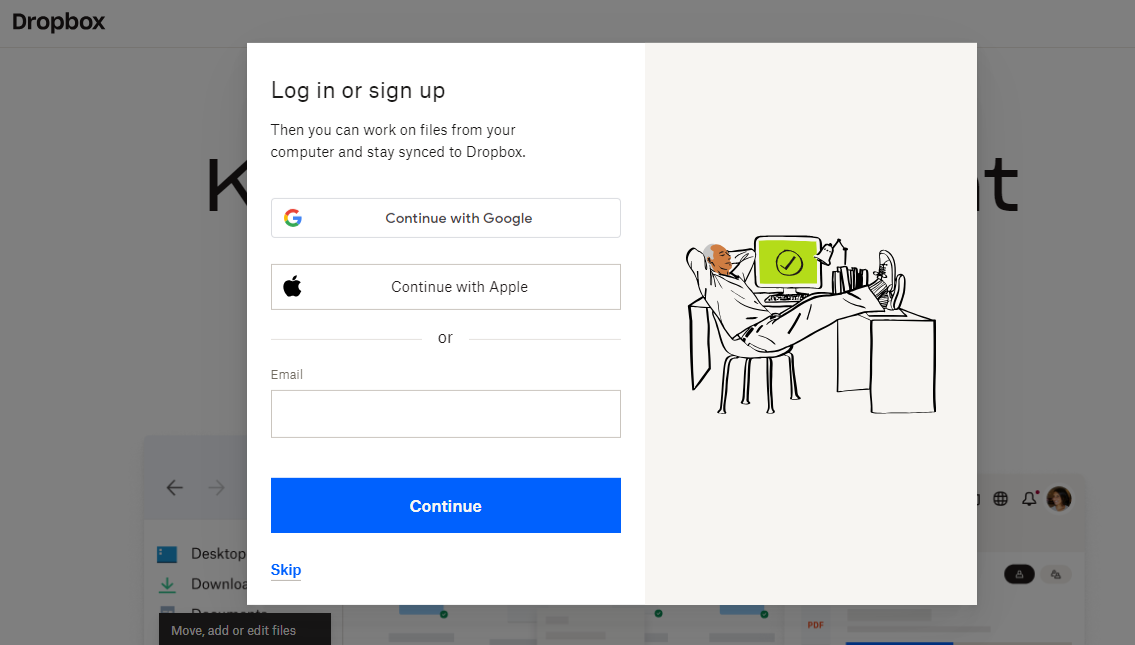
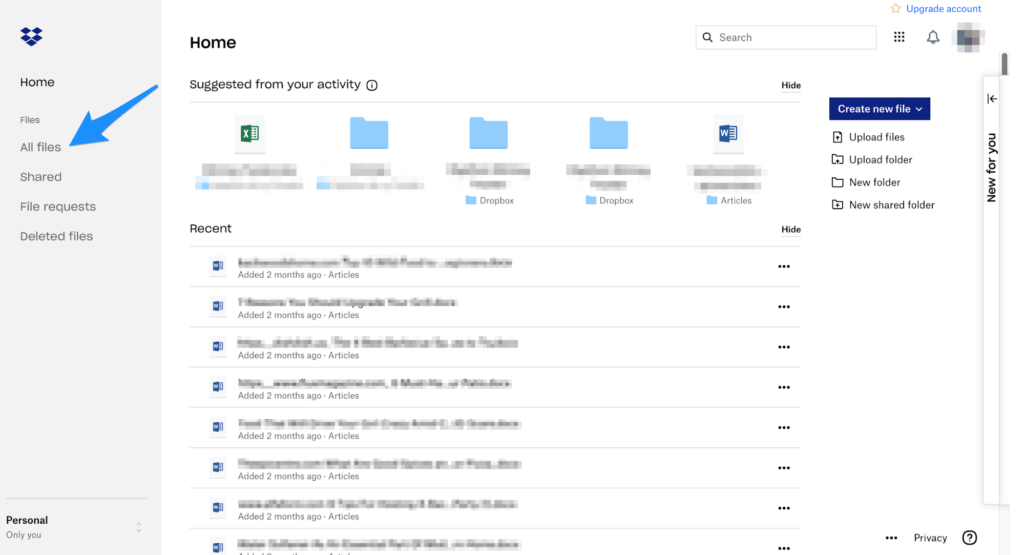
Step 2. Upload Music to Dropbox: Open Dropbox on your iPhone, navigate to the music files you want to transfer, and upload them to your Dropbox account.

Step 3. Access Dropbox on Computer: Launch Dropbox on your computer, and you’ll find your uploaded music files there.
How To Send Music From iPhone To Computer With iTunes
You can move files between your PC and your iOS device using iTunes File Sharing. iTunes works well for transferring your purchased music.
Now, let’s take a look and see how you can transfer your music from iPhone to computer using iTunes.
We’ll be discussing two options in this section; one each for PCs and Macs. So let’s see what methods we can use in this case.
Option 1. iTunes (PC & Mac)
If you are using a Windows PC or a Mac running macOS Mojave and earlier versions, iTunes is an option for you to copy music to your PC or Mac from your iPhone.
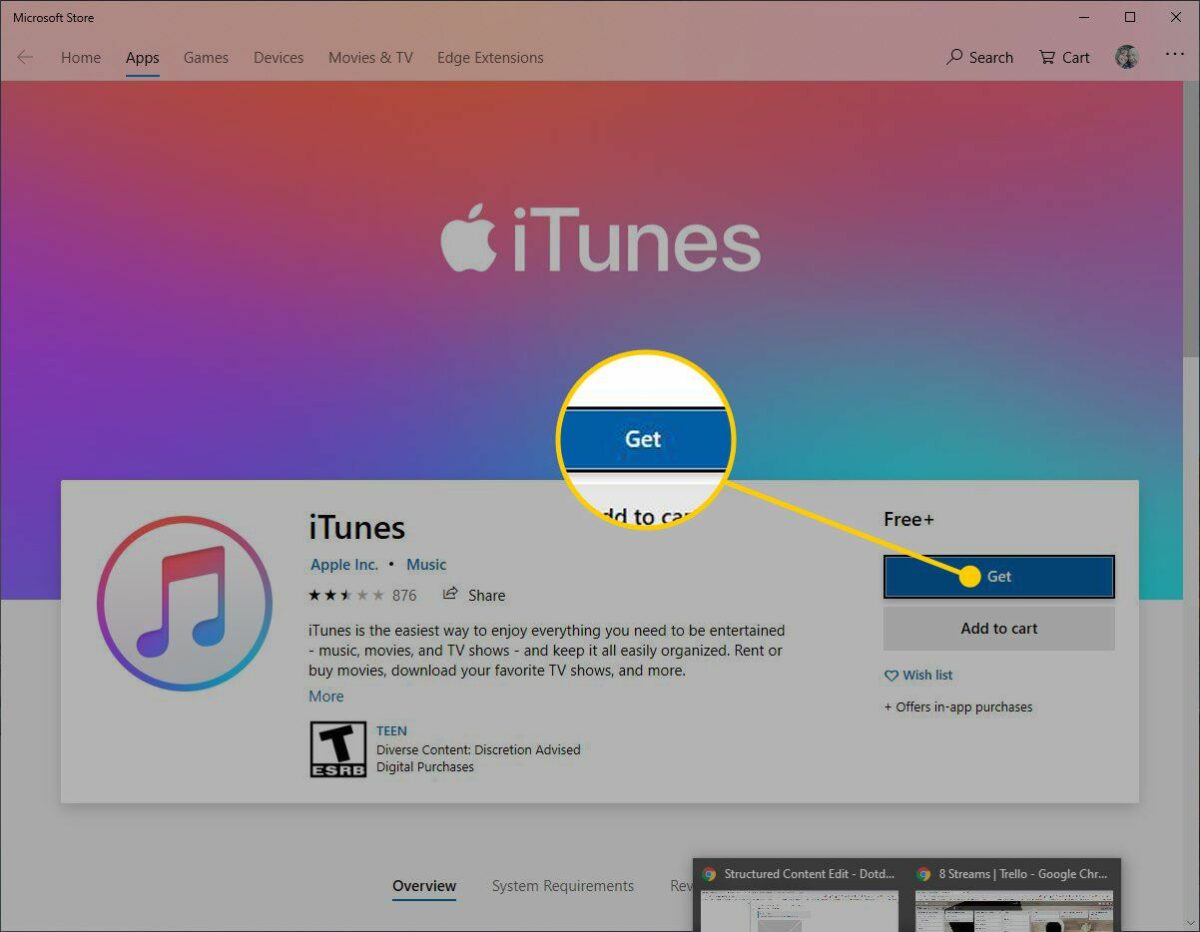
Step 1. Install iTunes: If you don’t have iTunes on your PC, download and install it from the official Apple website.
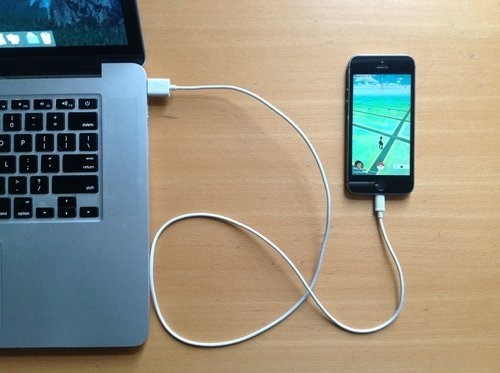
Step 2. Connect iPhone: Connect your iPhone to your PC using a USB cable.
Step 3. Authorize Your PC: If prompted, authorize your computer by entering your Apple ID.

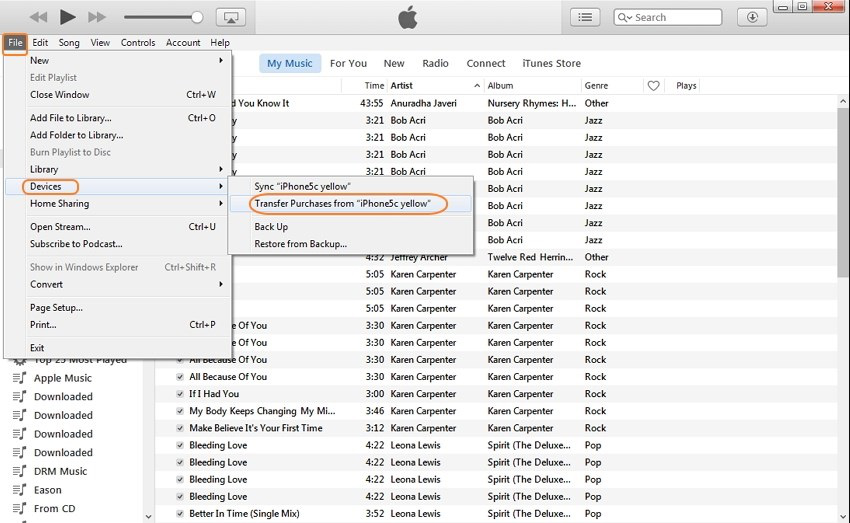
Step 4. Transfer Purchases: Click on your device icon in iTunes, navigate to File, scroll down to “Devices”, and click on “Transfer Purchases from Your Device.” You can also click “File Sharing” and choose the app on your computer to transfer the music files.
Option 2. Finder (Mac)
This method is suitable for Mac users. If your Mac is running macOS Catalina and later versions, you can use Finder to send music from your iPhone to your Mac.
Step 1. Connect iPhone: Use a USB cable to connect your iPhone to your Mac.
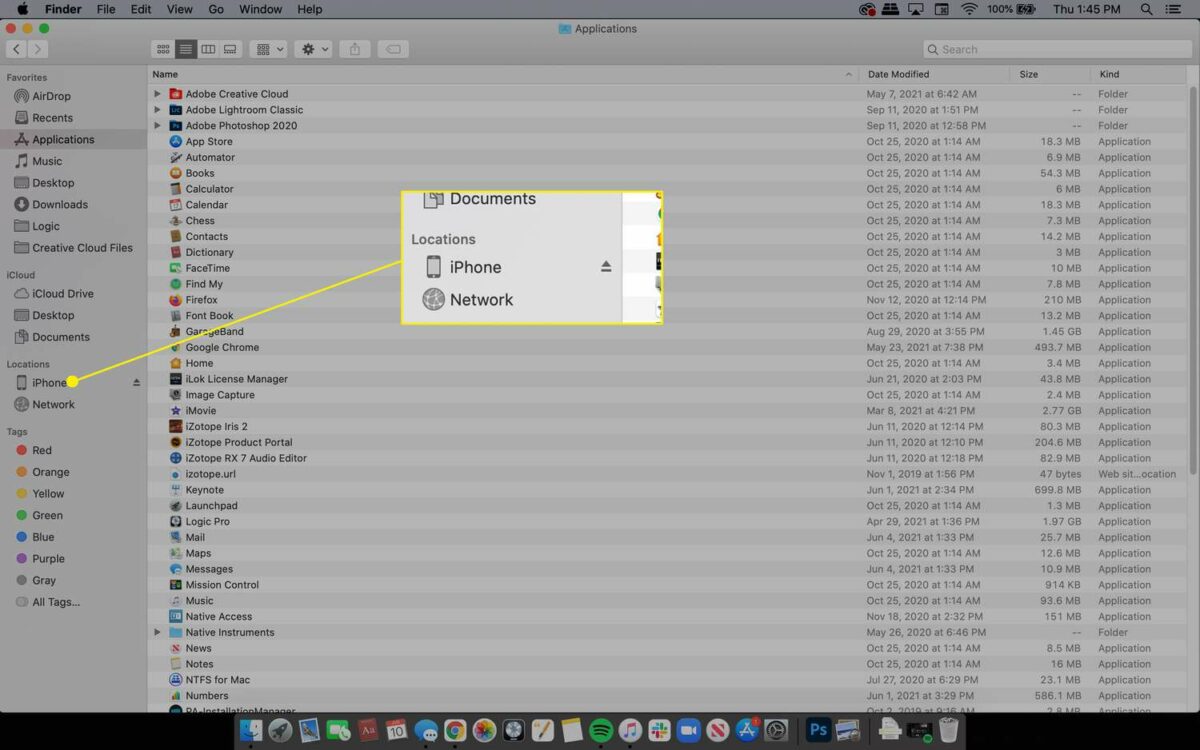
Step 2. Open Finder: Open a Finder window. Your connected iPhone should appear in the sidebar under “Locations.”
Step 3. Authorize Your Mac: If prompted, authorize your Mac by entering your Apple ID.
Step 4. Transfer Music: In the Finder window, select your device, then choose “Music” in the tabs. Select the songs you want to transfer and drag them to your desired location on your Mac.
Conclusion
And there we go, fellow music enthusiasts! We’ve delved into multiple techniques to seamlessly shift your favorite tracks from your iPhone to your computer.
Whether you’re drawn to the user-friendly nature of tools like EaseUS MobiMover, the automated process of iCloud, the handy features of Dropbox, or the well-known iTunes and Finder, the decision is in your hands.
FAQs On How To Transfer Music From iPhone To Computer
1. Can I AirDrop Music From My iPhone To My Mac?
Absolutely! AirDrop is another fantastic way to transfer music between Apple devices. Simply enable Bluetooth and Wi-Fi, select the music, and send it via AirDrop.
2. How To Download Music From My iPhone To My Laptop?
You can use methods like EaseUS MobiMover, iCloud, Dropbox, iTunes, or Finder to download music from your iPhone to your laptop
3. How Do I Transfer Music From My iPhone To My Computer Via USB?
Methods like EaseUS MobiMover, iTunes (for PC), and Finder (for Mac) allow you to transfer music from your iPhone to your computer using a USB cable.