
Are you one of the many iPhone users who found the U2 album automatically added to your music library?
If so, you may be wondering how to delete U2 from iPhone.
While the album was initially released as a free gift from Apple, it’s understandable that not everyone wants it clogging up their music collection.
The good news is that removing the U2 album from your iPhone is a relatively simple process.
There are a few different methods you can use, depending on your preferences and the tools you have available.
In this article, we’ll walk you through some of the most common ways to delete U2 from your iPhone, so you can enjoy a cleaner, more streamlined music library.
How To Delete U2 From iPhone
Step 1: Disable Automatic Downloads
If you’re tired of U2’s Songs of Innocence album showing up on your iPhone, the first thing you should do is disable automatic downloads.
By default, Apple has enabled automatic downloads for music, apps, and books on all your devices that are signed in with the same Apple ID.
So, if you have purchased or downloaded the U2 album on one device, it will automatically download to all your other devices connected to the same Apple ID.
To disable automatic downloads for music:
- Go to Settings on your iPhone.
- Tap iTunes & App Store.
- Under Automatic Downloads, toggle off the switch next to Music.
Now, any new music purchases or downloads on other devices will not automatically download to your iPhone.
If you want to disable automatic downloads for apps and books as well, you can do so by toggling off the switches next to Apps and Books under Automatic Downloads.
Step 2: Delete U2 Album
Once you have located the U2 album, you can proceed with deleting it from your device.
There are two options to choose from: deleting from the Music app or deleting from iTunes.
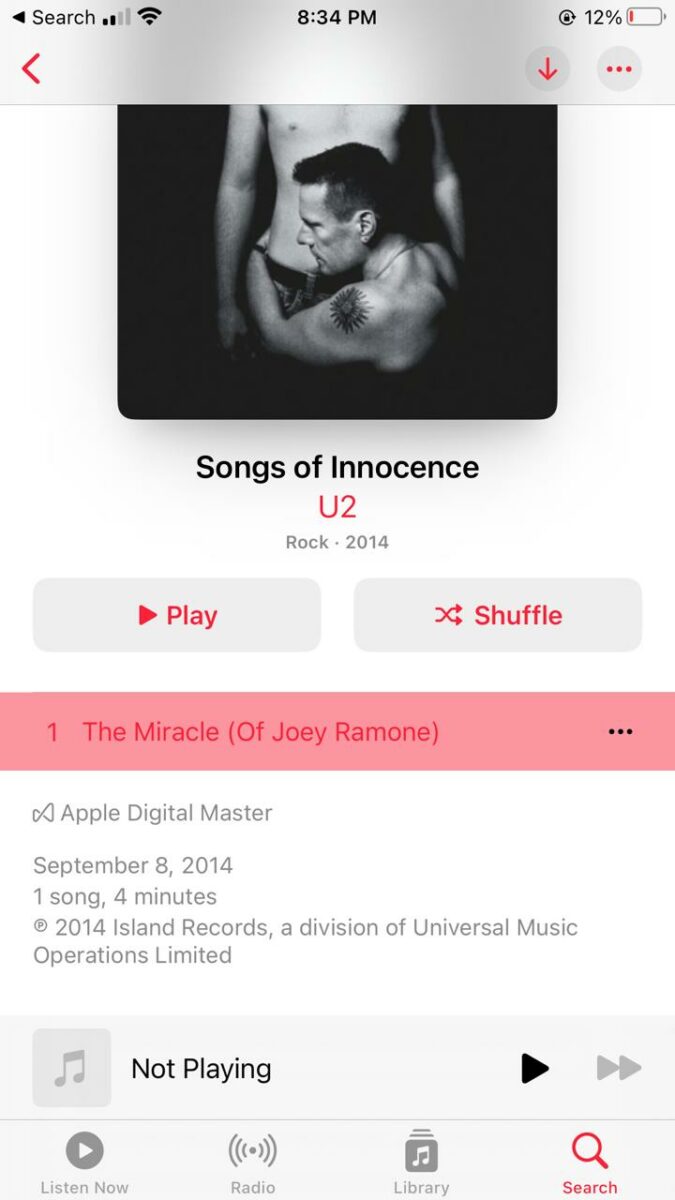
Option 1: Delete from Music App
To delete the U2 album from the Music app on your iPhone, follow these steps:
- Open the Music app on your iPhone.
- Locate the U2 album in your library.
- Tap and hold the album until a menu appears.
- Select “Remove from Library.”
Once you have completed these steps, the U2 album will be removed from your device.
Option 2: Delete from iTunes
To delete the U2 album from iTunes on your computer, follow these steps:
- Open iTunes on your computer.
- Click on “Music” in the top left corner of the screen.
- Locate the U2 album in your library.
- Right-click on the album and select “Delete from Library.”
Once you have completed these steps, the U2 album will be removed from your iTunes library and will no longer be synced with your iPhone.

Step 3: Hide U2 Purchase History
Now that you’ve removed the U2 album from your iPhone, it’s time to hide your purchase history to make sure it doesn’t show up again. Follow these simple steps:
- Open the App Store on your iPhone.
- Tap on your profile picture in the top right corner of the screen.
- Tap on “Purchased.”
- Find the U2 album and swipe left on it.
- Tap on “Hide.”
By hiding the U2 album from your purchase history, you won’t have to worry about accidentally downloading it again in the future.
It’s a quick and easy way to keep your iPhone clutter-free and personalized to your own taste in music.
Remember that hiding your purchase history doesn’t delete it completely.
If you want to completely remove your purchase history, you’ll need to do it through iTunes on your computer.
However, hiding it is a good compromise if you don’t want to completely erase your history.
Key Takeaways
Deleting U2 from your iPhone can be a simple process, but it may require a few steps. Here are some key takeaways to keep in mind:
- You can delete the U2 album directly from the Music app by tapping the circle with three dots near the top and selecting either Remove or Delete from Library.
- You can also delete the album from your iTunes library by signing in with your Apple ID, selecting Purchased from the Quick Links menu, finding the album, and deleting it.
- If you want to remove the U2 album from your iPhone permanently, you can turn off iTunes Match in the Settings app, connect your iPhone to your computer, and uncheck the U2 album from the list of music to be synced.
- If you’re having trouble deleting the U2 album or want additional assistance, you can contact Apple Support for help.
By following these steps, you can easily remove the U2 album from your iPhone and free up space for the music you actually want to listen to.
Don’t let unwanted albums clutter your device – take control of your music library today!